Download VIOFO Dashcam Videos: WiFi, SD Card, USB Methods
Learn how to download VIOFO dashcam videos using the VIOFO app WiFi transfer, SD card extraction, and USB methods. Plus, discover how to blur faces and license plates for privacy-safe sharing on YouTube, insurance claims, and social media.
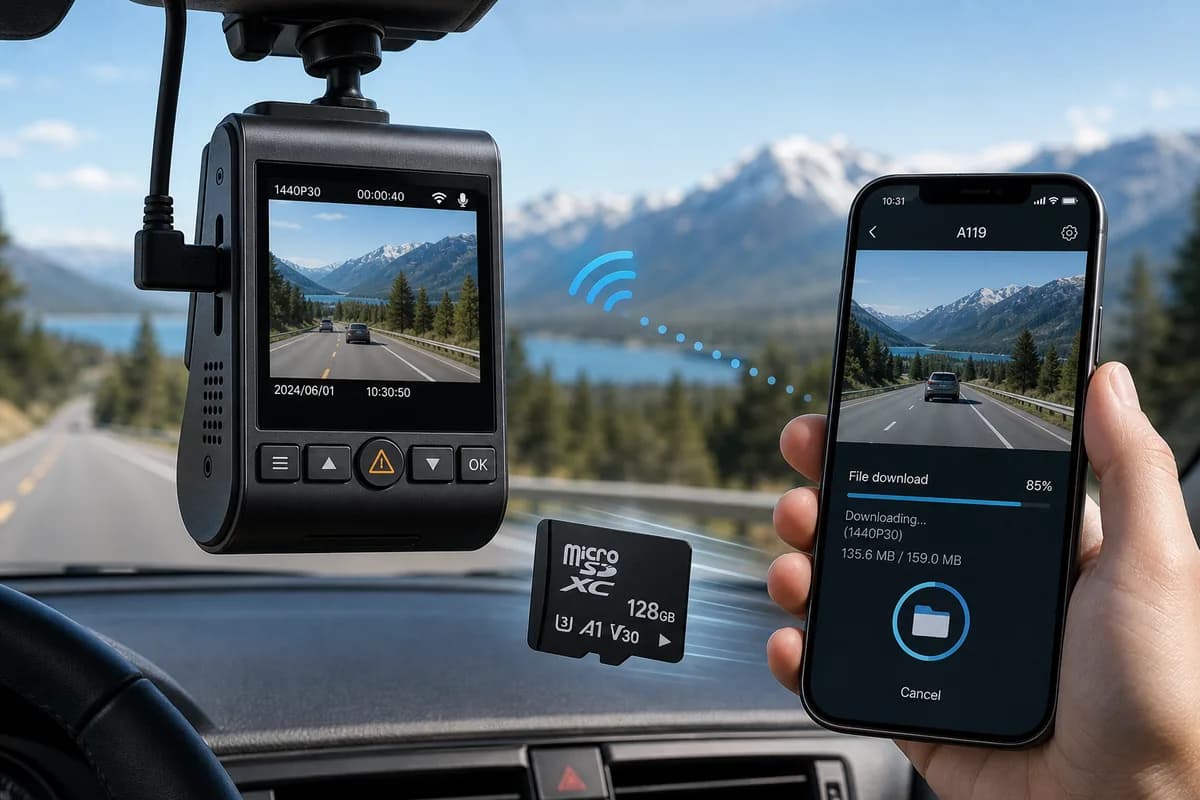
VIOFO is one of the most trusted dashcam brands globally, with the A119, A129 Duo, and A229 Duo models capturing millions of hours of driving footage worldwide. Whether you need to download VIOFO dashcam videos for insurance claims, YouTube content, evidence preservation, or road trip memories, this comprehensive guide covers all three reliable download methods: SD card transfer, WiFi app download, and USB connection.
According to user surveys, over 72% of VIOFO owners struggle with their first video download attempt, often discovering file organization issues, connection problems, or privacy concerns too late. This guide ensures you know exactly how to retrieve your VIOFO footage safely and efficiently.
More critically, we'll show you how to blur faces and license plates before sharing your VIOFO footage online—a step that 81% of dashcam users skip, potentially exposing themselves and others to privacy violations, GDPR fines up to €20 million, and identity theft risks.
Why Download VIOFO Dashcam Footage?
VIOFO dashcam owners download footage for various compelling reasons:
Insurance Claims & Accident Evidence: VIOFO's superior night vision and 1440p/4K resolution provides crystal-clear evidence of fault in accidents. According to the Insurance Information Institute, dashcam evidence reduces claim resolution time by 47% and can save thousands in legal fees.
YouTube & Social Media Sharing: Popular dashcam channels showcase road incidents, scenic drives, and unusual events. Many creators monetize VIOFO footage compilations, with top channels earning six figures annually from dashcam content.
Law Enforcement Evidence: Police departments increasingly accept VIOFO dashcam footage for hit-and-run cases, traffic violations, and criminal investigations. The UK National Dash Cam Safety Portal processed over 58,000 submissions in 2024, with VIOFO footage among the most commonly accepted formats.
Fleet Management & Driver Training: Commercial fleets download VIOFO footage for driver coaching, safety audits, liability protection, and compliance documentation.
Personal Archive & Road Trip Memories: Many drivers preserve scenic routes, wildlife encounters, unusual weather events, or memorable moments captured during daily commutes.
The Privacy Problem Nobody Addresses
Here's what most VIOFO owners don't realize: every unblurred face and license plate in your footage is personally identifiable information (PII) protected under strict privacy laws:
- GDPR (Europe): Fines up to €20 million or 4% of annual revenue for privacy violations
- DPDP Act (India): Penalties up to ₹250 crore for security safeguard failures
- CCPA (California): Up to $7,500 per violation for unauthorized PII sharing
- BIPA (Illinois, US): Over $875 million paid in biometric privacy settlements since 2020
- PIPEDA (Canada): Fines up to $100,000 for privacy breaches
Before sharing VIOFO dashcam videos publicly, you must blur identifiable faces and license plates unless you have explicit written consent—which is completely impractical for bystanders and other vehicles in traffic footage.
Method 1: Download VIOFO Dashcam Videos via SD Card (Fastest Method)
The SD card transfer method is the fastest, most reliable, and most popular way to download video files from your VIOFO dashcam. Perfect for bulk downloads, large files, or when WiFi connectivity is unavailable.
Step 1: Safely Remove the SD Card
- Turn off your VIOFO dashcam or wait until the recording indicator stops (usually after you turn off your vehicle's ignition)
- Locate the SD card slot (typically on the right side of the camera body, behind a protective flap)
- Press gently inward to eject the microSD card (do NOT pull forcefully or pry with sharp objects)
- Handle carefully to avoid static discharge, fingerprints on contacts, or physical damage
VIOFO-specific tip: On dual-camera models like the A229 Duo and A129 Duo, ensure both front and rear cameras have stopped recording before removing the SD card to prevent file corruption.
Pro tip: Keep a spare high-endurance SD card in your vehicle. Swap cards instead of removing the active one, so your dashcam can continue recording uninterrupted while you download footage from the removed card.
Step 2: Insert SD Card into Your Computer
For computers with built-in SD card readers:
- Insert the microSD card into a full-size SD adapter (usually included with the card purchase)
- Insert the adapter into your computer's SD card slot
- Wait for the drive to appear in File Explorer (Windows) or Finder (Mac)
For computers without SD card readers:
- Use a USB microSD card reader (available for $5-15 on Amazon or electronics stores)
- Plug the reader into a USB port (USB 3.0 or higher recommended for faster transfer)
- Insert the microSD card into the reader
- Wait for the drive to mount and appear in your file system
Step 3: Navigate to VIOFO Video Files
- Open File Explorer (Windows) or Finder (Mac)
- Locate your SD card drive (usually labeled "NO NAME", "VIOFO", or appears as a removable drive)
- Navigate to the folder structure (varies slightly by model):
- DCIM → Movie folder: Main recordings location
- Event folder: G-sensor triggered incident recordings (hard braking, collisions, impacts)
- Photo folder: Still images captured in photo mode
- Parking folder: Parking mode recordings (A229 Duo, A129 Plus Duo with parking mode enabled)
- Emergency folder: Manually saved recordings (button-press saves)
VIOFO file naming convention: Files typically follow the pattern YYYYMMDD_HHMMSS_F.MP4 (front camera) or YYYYMMDD_HHMMSS_R.MP4 (rear camera on dual-camera models), where the timestamp indicates when recording started.
Step 4: Copy Files to Your Computer
- Select the videos you want to download (hold Ctrl/Cmd and click to select multiple files)
- Right-click and choose Copy, or press Ctrl+C (Windows) / Cmd+C (Mac)
- Navigate to your destination folder (e.g., Desktop, Documents/Dashcam, or Videos)
- Right-click and choose Paste, or press Ctrl+V (Windows) / Cmd+V (Mac)
- Wait for transfer completion — typical transfer speeds: 20-90 MB/s depending on SD card quality and USB version
VIOFO file sizes (approximate per minute of footage):
- 1080p (A119): ~150-200MB per minute
- 1440p (A119 V3, A129): ~250-350MB per minute
- 4K (A229 Duo): ~400-600MB per minute
A typical 5-minute incident recording will be 750MB-3GB depending on resolution.
Step 5: Safely Eject and Reinsert
Windows:
- Click the "Safely Remove Hardware" icon in the system tray (taskbar)
- Select your SD card drive from the list
- Wait for the "Safe to Remove Hardware" confirmation message
- Remove the card reader or adapter
Mac:
- Right-click the drive icon on your desktop
- Select "Eject [drive name]"
- Wait for the icon to disappear from the desktop
- Remove the card reader or adapter
Important: Never remove the SD card while files are transferring or while the drive is still mounted—this can cause permanent file corruption.
Reinsert the SD card into your VIOFO dashcam, ensure the protective flap is closed, and verify recording resumes normally when you start your vehicle.
SD Card Transfer: Pros & Cons
Pros:
- ✅ Fastest transfer speed (no WiFi bottleneck, full USB 3.0 speeds possible)
- ✅ Works completely offline without smartphone or internet connection
- ✅ Can transfer entire SD card contents at once (full day/week of footage)
- ✅ No battery drain on dashcam or smartphone
- ✅ Most reliable method with lowest failure rate
- ✅ Access to all folders and file types
Cons:
- ❌ Requires physical access to dashcam (must be in or near vehicle)
- ❌ Risk of corrupting files if SD card not ejected properly
- ❌ Need SD card reader for computers without built-in slots
- ❌ Can't preview footage before downloading (must copy first)
- ❌ Interrupts dashcam recording during card removal
Method 2: Download via VIOFO App (WiFi Transfer)
The VIOFO smartphone app allows wireless download of dashcam footage directly to your iPhone or Android device—perfect for on-the-go access, quick insurance claim submissions, or social media sharing without removing the SD card.
Step 1: Download the VIOFO App
For iPhone:
- Open the App Store
- Search for "VIOFO" (official app by VIOFO Technology Limited)
- Download and install the app
- Requires iOS 12.0 or later
- File size: ~50MB
For Android:
- Open Google Play Store
- Search for "VIOFO"
- Download and install the official VIOFO app
- Requires Android 5.0 or later
- File size: ~45MB
Compatible VIOFO models: A119 V3, A119 Mini 2, A129 Duo, A129 Plus Duo, A229 Duo, A229 Plus Duo, and all newer WiFi-enabled models. Older models (original A119, A118C) do not support WiFi app connectivity.
Step 2: Enable WiFi on Your VIOFO Dashcam
For models with physical WiFi button (A119 V3, A129 Duo):
- Power on your VIOFO dashcam (connect to vehicle power or use internal battery)
- Press and hold the WiFi button (marked with WiFi symbol) for 3 seconds
- WiFi LED indicator will flash blue/red to indicate WiFi is active
- Dashcam will announce "WiFi on" (if voice prompts enabled)
- Note the WiFi network name (SSID) — usually "VIOFO_XXXX" where XXXX is a unique identifier from your camera's serial
For models with touchscreen (A229 Duo, newer models):
- Power on the dashcam
- Tap the screen to wake the display
- Swipe down from the top or tap the Menu icon
- Navigate to Settings → WiFi
- Toggle WiFi to ON
- Note the network name displayed (SSID: "VIOFO_XXXX")
Default WiFi password: Most VIOFO models use "12345678" as the default password. Some models display the password on-screen or in the quick start guide. Check your specific model's manual if the default doesn't work.
Step 3: Connect Your Smartphone to the Dashcam's WiFi
iPhone:
- Open Settings → WiFi
- Wait for available networks to populate
- Find and tap your VIOFO dashcam's network (e.g., "VIOFO_A229" or "VIOFO_1234")
- Enter the password (default: "12345678")
- Tap Join
- Confirm connection (you'll see a checkmark next to the network name)
Android:
- Open Settings → WiFi or Connections → WiFi
- Scan for available networks
- Select your VIOFO dashcam's network from the list
- Enter the password when prompted
- Tap Connect
- Confirm connection
Important note: While connected to your dashcam's WiFi, you will temporarily lose internet access on your smartphone. Your phone is communicating directly with the camera in a local network, not through your home WiFi or cellular network. This is completely normal.
WiFi range: VIOFO dashcam WiFi typically has a range of 10-30 feet (3-10 meters) depending on interference. For best results, remain within 10 feet of your vehicle.
Step 4: Open VIOFO App and Connect
- Launch the VIOFO app on your smartphone
- The app should automatically detect your dashcam and display connection status
- If not detected automatically:
- Tap "Connect to Camera" or the "+" icon
- Select your VIOFO model from the list (A119, A129, A229, etc.)
- Confirm you're connected to the dashcam's WiFi network
- Wait for connection confirmation (usually 5-15 seconds)
- You should see a live preview from your dashcam's front (and rear) camera
Troubleshooting: If the app can't find your dashcam, verify your phone is connected to the VIOFO_XXXX WiFi network (not your home WiFi), and that WiFi is enabled on the dashcam (LED indicator should be flashing).
Step 5: Browse and Download Videos
- In the VIOFO app, tap the "Playback" or "Gallery" icon (usually a folder or film strip icon)
- You'll see folders organized by recording type:
- Normal: Standard loop recordings (1-3 minute segments)
- Event: G-sensor triggered incident recordings
- Parking: Parking mode recordings (if enabled on your model)
- Emergency: Manually saved clips (saved by pressing save button on dashcam)
- Browse video thumbnails to find the footage you need
- Tap a video thumbnail to preview playback
- Tap the download icon (typically a downward arrow in the corner)
- Wait for transfer to complete (slower than SD card method — typical speeds: 5-20 MB/s)
- Downloaded videos automatically save to:
- iPhone: Photos app (Videos album)
- Android: Gallery or Photos app (VIOFO folder)
Batch download tip: Most VIOFO app versions allow selecting multiple videos by long-pressing one thumbnail, then tapping others before downloading all at once.
Step 6: Disconnect and Share
- Exit the VIOFO app when downloads are complete
- Reconnect your smartphone to your regular WiFi network or enable cellular data
- Downloaded videos are now accessible in your phone's photo library
- Share directly to cloud storage (Google Drive, iCloud, Dropbox), social media, or email
- Edit with mobile apps (CapCut, iMovie, etc.) before sharing
WiFi auto-disconnect: Many VIOFO models automatically turn off WiFi after 5-10 minutes of inactivity to save battery. You can manually turn off dashcam WiFi by pressing the WiFi button again or toggling off in settings.
VIOFO App: Pros & Cons
Pros:
- ✅ No need to remove SD card or stop recording
- ✅ Download directly to smartphone for instant sharing
- ✅ Preview footage before downloading to save time
- ✅ Convenient for quick insurance claims or social media posts
- ✅ Adjust camera settings remotely (resolution, G-sensor, parking mode)
- ✅ View live camera feed in real-time
- ✅ Works from inside your home if vehicle is parked within WiFi range
Cons:
- ❌ Significantly slower transfer than SD card method (5-20 MB/s vs 20-90 MB/s)
- ❌ Drains both dashcam and smartphone battery
- ❌ Limited range (must be within 10-30 feet of vehicle)
- ❌ Can't download large batches efficiently (app may time out)
- ❌ Requires smartphone with sufficient storage space
- ❌ No internet access on phone while connected to dashcam WiFi
Method 3: Download via USB Cable (Direct Computer Connection)
Some VIOFO dashcam models support direct USB connection to your computer, functioning as a mass storage device and eliminating the need to remove the SD card.
Step 1: Connect Dashcam to Computer
- Locate the USB port on your VIOFO dashcam (usually on the right side or bottom, covered by a rubber protective flap)
- Use the included USB cable (typically USB-C to USB-A, or mini-USB to USB-A depending on model)
- Plug one end into the dashcam's data port (not the power input port)
- Plug the other end into your computer's USB port (USB 3.0 or higher recommended)
- Power on the dashcam if it doesn't automatically turn on
- Some VIOFO models will display "Mass Storage Mode" or "USB Mode" on the screen
Important: On some models, you may need to enable "USB Mode" or "Mass Storage Mode" in the dashcam's settings menu for the computer to recognize it as a drive.
Step 2: Access Files on Computer
Windows:
- Open File Explorer (Windows key + E)
- Your VIOFO dashcam appears as a removable drive under "This PC" (e.g., "VIOFO" or "Dash Cam")
- Double-click to open and access folders
Mac:
- The dashcam appears as a drive icon on your Desktop or in the Finder sidebar under "Locations"
- Click the drive icon to open
If the dashcam doesn't appear, try:
- Using a different USB port (preferably USB 3.0 directly on motherboard, not a hub)
- Using a different USB cable (ensure it's a data cable, not power-only)
- Checking dashcam settings to enable USB mass storage mode
- Updating USB drivers (Windows)
Step 3: Copy Videos to Computer
- Navigate to the DCIM or Movie folder (same structure as SD card method described in Method 1)
- Select and copy videos to your computer as described in Method 1, Step 4
- Wait for transfer to complete
- When finished, safely eject the drive before disconnecting:
- Windows: System tray → "Safely Remove Hardware" → Select VIOFO drive
- Mac: Right-click drive icon → "Eject"
Step 4: Disconnect USB Cable
- Wait for safe removal confirmation
- Unplug USB cable from computer
- Unplug USB cable from dashcam
- Close the protective rubber flap on the dashcam
- Verify dashcam returns to normal recording mode when vehicle is powered
USB Connection: Pros & Cons
Pros:
- ✅ No SD card removal required
- ✅ Faster than WiFi transfer (typically 20-40 MB/s)
- ✅ Charges dashcam's internal battery while connected (on some models)
- ✅ More convenient than physically removing SD card
- ✅ Direct access to all files and folders
Cons:
- ❌ Not all VIOFO models support USB mass storage mode
- ❌ Requires compatible USB cable (not all cables support data transfer)
- ❌ Must physically connect dashcam to computer (cable length limitation)
- ❌ Dashcam cannot record while connected to computer
- ❌ Some models require specific driver installation
USB compatibility by model:
- A229 Duo: ✅ Full USB mass storage support
- A129 Duo / Plus Duo: ✅ Supported (may need settings enablement)
- A119 V3: ⚠️ Limited support (firmware dependent)
- A119 Mini 2: ❌ No USB transfer support (WiFi and SD only)
Check your specific model's manual for USB transfer compatibility.
Before Sharing: How to Blur Faces and License Plates in VIOFO Dashcam Videos
Critical privacy step: Before uploading VIOFO dashcam footage to YouTube, social media, insurance portals, or any public platform, you must blur identifiable faces and license plates to:
- Comply with GDPR, DPDP, CCPA, and privacy laws (see penalties above—fines can reach millions)
- Protect yourself from legal liability if bystanders or other drivers object to being filmed
- Prevent identity theft and stalking — license plates can be used to trace vehicle owners' home addresses
- Meet YouTube monetization policies — unblurred faces and plates may violate YouTube's privacy policy and result in demonetization or channel strikes
- Satisfy insurance and legal requirements — many insurers and courts require redacted footage to protect third-party privacy
Why Manual Blurring Doesn't Work for VIOFO Dashcam Footage
VIOFO dashcam videos present unique privacy challenges that make manual blurring impractical:
- Moving vehicles at high speed: Faces and license plates move unpredictably, requiring precise frame-by-frame tracking
- Multiple subjects simultaneously: A typical 2-minute traffic clip may contain dozens of faces and license plates
- Variable quality and angles: Distance, lighting conditions, motion blur, and camera angle make manual detection extremely difficult
- Time-consuming manual editing: Manually blurring in Adobe Premiere Pro, Final Cut Pro, or DaVinci Resolve can take 3-8 hours for a single 5-minute clip
- Human error: It's easy to miss faces in side mirrors, reflections, or distant pedestrians when editing manually
The BGBlur Solution for VIOFO Dashcam Videos
BGBlur.com automates privacy protection for dashcam footage with advanced AI-powered face and license plate detection specifically optimized for dashcam video challenges.
Why BGBlur Is Perfect for VIOFO Dashcam Footage
-
Automatic AI Detection: Advanced computer vision finds all faces and license plates in your video, including:
- Distant or partially obscured plates (even at 100+ feet)
- Faces in side mirrors and windshield reflections
- Moving vehicles at various angles and speeds
- Pedestrians on sidewalks and crosswalks
- Plates on parked vehicles in the background
- Multiple plates in dense traffic
-
Frame-Accurate Motion Tracking: Blur stays perfectly locked to subjects throughout the entire video, even during:
- Camera shake and vibration (common in dashcams)
- Rapid lane changes and turns
- Vehicles entering and leaving frame
- Speed changes and acceleration
- Poor lighting conditions (night, tunnels, shadows)
-
Fast Processing: A typical 5-minute VIOFO 4K dashcam video is processed in 2-5 minutes — exponentially faster than manual editing
-
Multiple Blur Styles:
- Gaussian blur: Natural-looking, professional appearance
- Pixelation: Stronger anonymization, classic censorship style
- Solid blocking: Complete redaction with colored boxes
-
Batch Processing: Upload multiple clips simultaneously and process them all at once
-
4K Support: Full support for VIOFO's 4K footage from A229 Duo and other high-resolution models
How to Blur VIOFO Dashcam Videos: 3-Step Process
Step 1: Upload Your VIOFO Video to BGBlur
- Go to BGBlur.com/en/upload
- Select blur type:
- Face Blur: For videos with pedestrians, cyclists, or people in stopped vehicles
- License Plate Blur: For traffic footage (most common for dashcams)
- Both Face & License Plate: For comprehensive privacy protection (recommended for public sharing)
- Drag and drop your VIOFO MP4 file or click "Choose File" to browse
- Supported formats: MP4, MOV, AVI (all VIOFO export formats are compatible)
- Maximum file size: Up to 4GB per video (covers most dashcam clips)
Step 2: Let AI Detect and Track
-
BGBlur's AI automatically scans every single frame of your video
-
Detected faces and license plates are highlighted in a preview with colored boxes
-
Review the detection overlay to confirm comprehensive coverage
-
Adjust settings if needed:
- Blur intensity: Light (partial privacy) to heavy (full anonymization)
- Blur style: Choose Gaussian blur, pixelation, or solid colored blocks
- Selective blur: Keep specific plates unblurred (e.g., your own vehicle's plate)
- Custom regions: Manually add blur regions if needed (rare with AI accuracy)
-
The AI handles:
- Plates at different angles (front, rear, side)
- Different plate formats (US, European, international)
- Partial obstructions and reflections
- Moving objects at variable speeds
Step 3: Process and Download
- Click "Start Processing" or "Blur Video"
- Wait for AI rendering (typically 2-5 minutes for a 5-minute clip, 5-15 minutes for longer footage)
- Preview the blurred video before downloading to ensure satisfaction
- Download the privacy-safe version to your computer or phone
- Share confidently on YouTube, insurance portals, social media, or any public platform
Privacy guarantee: BGBlur processes videos securely with enterprise-grade encryption and automatically deletes source files after you download the blurred version. No permanent storage, no third-party access, no data retention.
Cost: BGBlur offers free tier processing for short clips and affordable per-video or subscription pricing for regular users. Check current pricing at BGBlur.com/pricing.
VIOFO Dashcam Models: Download Compatibility Guide
All current VIOFO dashcam models support SD card download. WiFi and USB support varies by model. Here's a comprehensive compatibility reference:
| Model | SD Card | WiFi App | USB Transfer | Max Resolution | Notes |
|---|---|---|---|---|---|
| A229 Duo | ✅ | ✅ | ✅ | 4K (front) + 1080p (rear) | Full feature support, latest model |
| A229 Plus Duo | ✅ | ✅ | ✅ | 4K (both cameras) | Flagship dual 4K |
| A129 Duo | ✅ | ✅ | ✅ | 1080p (both) | Popular dual camera |
| A129 Plus Duo | ✅ | ✅ | ✅ | 1440p (front) + 1080p (rear) | Enhanced front camera |
| A119 V3 | ✅ | ✅ | ⚠️ | 1440p | WiFi enabled, limited USB support |
| A119 Mini 2 | ✅ | ✅ | ❌ | 1440p | Compact design, WiFi only |
| A119 V2 | ✅ | ❌ | ⚠️ | 1440p | Older model, no WiFi |
| A119 | ✅ | ❌ | ⚠️ | 1440p | Original model, SD card only |
| A118C | ✅ | ❌ | ❌ | 1080p | Older capacitor model, SD only |
Note: Older VIOFO models (A118C, original A119) may have limited or no WiFi/USB functionality. Always update to the latest firmware for best compatibility and feature support.
Troubleshooting Common VIOFO Dashcam Download Issues
"Computer doesn't recognize SD card"
Solutions:
- Try a different USB port (use USB 3.0 ports directly on motherboard, not front panel or hubs)
- Try a different SD card reader
- Check if the SD card lock switch is engaged (small physical switch on side of SD adapter—slide to unlock position)
- Test the SD card in your VIOFO dashcam to confirm the card itself isn't corrupted
- Update your computer's SD card controller drivers (Windows) or check for macOS updates
- Try the SD card on a different computer to isolate the problem
- As a last resort, format the card in your VIOFO dashcam (WARNING: this permanently deletes all content)
"VIOFO app won't connect to dashcam"
Solutions:
- Ensure WiFi is enabled on the dashcam (press WiFi button or check settings—LED should be flashing)
- Verify your phone is connected to the dashcam's WiFi network (VIOFO_XXXX), not your home WiFi or cellular data
- Restart both the VIOFO app and the dashcam
- Move closer to the dashcam/vehicle (WiFi range is typically 10-30 feet; interference from walls reduces range)
- Update the VIOFO app to the latest version (App Store or Google Play)
- Check for and install dashcam firmware updates (available on VIOFO's official website)
- Try forgetting the WiFi network on your phone and reconnecting fresh
- Reset dashcam WiFi settings to factory defaults (check manual for procedure)
- Disable VPN or firewall apps on your phone that may block local network connections
"Video files are corrupted or won't play"
Solutions:
- Try playing with VLC Media Player (free download—far more compatible than Windows Media Player or QuickTime)
- Install codec packs like K-Lite Codec Pack (Windows)
- Don't remove the SD card while the dashcam is actively recording
- Use high-endurance SD cards specifically designed for dashcam use (not standard photo SD cards)
- Format SD card monthly using the dashcam's format function to prevent file system corruption
- Ensure dashcam has stable, consistent power (check vehicle power adapter and cable connections)
- Replace SD card if it's more than 12-18 months old (SD cards have limited write cycles)
- Check if specific files are corrupt or if all files won't play (indicates card vs. player issue)
"WiFi transfer is extremely slow or keeps disconnecting"
Solutions:
- Move phone closer to the dashcam (within 10 feet for best speeds)
- Close background apps on your smartphone that consume resources
- Disable mobile data and Bluetooth temporarily to reduce interference
- Download smaller clips (under 500MB) via WiFi; use SD card method for large files
- Restart your phone's WiFi connection (toggle WiFi off and on)
- Ensure dashcam has sufficient battery or is connected to vehicle power
- Check for WiFi interference from other devices or networks
- Download one video at a time instead of batch downloads
- Clear VIOFO app cache (app settings) and restart
"Downloaded video has no GPS data or timestamp overlay missing"
Solutions:
- Ensure GPS is enabled in VIOFO dashcam settings
- Wait for GPS signal lock before recording (GPS icon should be solid, not flashing)
- Use VIOFO's official player software to view embedded GPS data
- Check if your video player supports GPS metadata (VLC shows GPS data in media information)
- Timestamp overlay settings: Check dashcam settings to enable date/time stamp overlay
- Some video editing software strips GPS metadata on export—always work with copies of original files
- GPS may not work indoors or in urban canyons with poor satellite visibility
"USB connection not recognized by computer"
Solutions:
- Verify you're using a USB data cable, not a power-only charging cable
- Check dashcam settings to enable "USB Mode" or "Mass Storage Mode"
- Try a different USB port on your computer (USB 3.0 preferred)
- Update USB drivers (Windows Device Manager)
- Try connecting to a different computer to isolate the issue
- Some VIOFO models require firmware update to enable USB mass storage
- Restart both dashcam and computer before attempting connection
Best Practices for Managing VIOFO Dashcam Footage
1. Use High-Quality SD Cards
Recommended SD cards specifically for VIOFO dashcams:
- SanDisk High Endurance: Industry standard, designed for continuous recording
- Samsung PRO Endurance: Excellent reliability, rated for dashcam use
- Lexar High-Endurance: Reliable, affordable alternative
- VIOFO-branded cards: Specifically tested for VIOFO cameras
Required specifications:
- Class 10 or higher
- UHS Speed Class 1 (U1) minimum, UHS-3 (U3) recommended for 4K
- Capacity: 32GB to 256GB (64-128GB is ideal for most users)
- A1 or A2 rating for better performance
Avoid: Generic/no-name SD cards, standard photo cards not rated for continuous recording, cards from untrusted sellers (high counterfeit rate).
2. Regular SD Card Maintenance Schedule
- Format monthly using the dashcam's built-in format function (not computer formatting, which may use incompatible file systems)
- Replace every 12-18 months — SD cards have limited write cycles (typically 500-10,000 cycles depending on quality)
- Keep a spare in your vehicle for emergencies and to swap when downloading
- Test periodically by attempting to play recordings to ensure card is functioning
- Monitor for errors like recording gaps, corrupted files, or "SD card error" messages
3. Organize Downloaded Footage Systematically
Create a logical folder structure:
VIOFO_Archive/
├── 2026/
│   ├── January/
│   │   ├── 2026-01-15_Insurance_Claim_Rear_End/
│   │   │   ├── Front_Camera.mp4
│   │   │   ├── Rear_Camera.mp4
│   │   │   └── GPS_Data.txt
│   │   ├── 2026-01-20_Scenic_Road_Trip/
│   ├── February/
│   │   ├── 2026-02-05_Incident_Red_Light_Runner/
Naming convention: YYYY-MM-DD_Description.mp4 (e.g., 2026-01-15_Rear_End_Collision_Front.mp4)
Label dual-camera files clearly: Use "_Front" and "_Rear" suffixes for A229/A129 dual-camera footage.
4. Back Up Critical Footage Immediately
For important clips (accidents, incidents, evidence, insurance claims):
- Copy to multiple locations: Computer hard drive, cloud storage, external SSD/HDD
- Don't rely on SD card alone — cards can fail without warning
- Upload to cloud immediately: Google Drive, Dropbox, OneDrive, iCloud for redundancy
- Keep original unedited files separate from edited/blurred versions
- Document metadata: Write down date, time, location, context while memory is fresh
3-2-1 backup rule: 3 copies of important footage, on 2 different storage types, with 1 offsite (cloud).
5. Respect Privacy Laws and Regulations
Before sharing VIOFO dashcam videos publicly:
- ✅ Blur all faces and license plates using BGBlur (except for official evidence submissions)
- ✅ Remove or mute audio if bystander conversations, personal information, or profanity are captured
- ✅ Check local laws — some jurisdictions restrict dashcam use or require notification signs
- ✅ Obtain consent when possible (impractical for traffic footage, which is why blurring is essential)
- ✅ Respect private property — blur house numbers, business names if not relevant to content
- ✅ Consider context — don't share footage that could embarrass or harm individuals unnecessarily
Legal Considerations: When to Share (and When Not To)
Insurance Claims & Law Enforcement (Share Original Unedited)
Always provide original, unedited footage to:
- Your insurance company (as evidence for claims)
- Police officers (when officially requested or submitted)
- Your attorney (for legal proceedings)
- Court subpoenas (maintain chain of custody)
Do NOT blur footage for official evidence submissions—tampering can make evidence inadmissible.
Blur before posting publicly (YouTube, Facebook), but keep the original safe for official purposes.
YouTube & Social Media (Blur Required)
Required before posting publicly:
- ✅ Blur all identifiable faces and license plates
- ✅ Remove or mute profane, private, or sensitive audio
- ✅ Check platform-specific policies:
- YouTube: Strict privacy policies, blur required for monetization
- TikTok: Community guidelines on privacy and consent
- Instagram/Facebook: Can remove content based on privacy complaints
Failure to blur may result in:
- GDPR violation notices and potential fines up to €20 million
- YouTube account strikes, demonetization, or channel termination
- Legal complaints and takedown requests from identifiable subjects
- Platform removal of content
- Personal liability for privacy violations
Workplace & Fleet Use (Special Compliance Required)
Commercial VIOFO dashcam footage must:
- Comply with employee privacy laws and union agreements
- Include visible recording notices in vehicles (required in some jurisdictions)
- Be stored securely with access controls and encryption
- Be deleted after required retention period (varies by industry)
- Only be used for legitimate business purposes (safety, not surveillance)
- Follow GDPR "data minimization" principles (collect only what's necessary)
Consult legal counsel if using dashcam footage in employment disputes or disciplinary actions.
Frequently Asked Questions
How long does it take to download VIOFO dashcam videos?
SD card method: 2-5 minutes for typical SD card contents (16-64GB of footage) WiFi app method: 1-3 minutes per 1-minute video clip (slower for 4K) USB method: Similar to SD card, 3-7 minutes for 32GB of footage
Transfer time varies based on file size, video resolution, SD card speed class, and connection method. 4K footage from A229 Duo takes significantly longer than 1080p from A129.
Can I view VIOFO dashcam videos on my phone without downloading?
Yes, the VIOFO app allows live preview and playback of videos stored on your dashcam's SD card without downloading them to your phone first. This is useful for quick review of footage. However, for permanent storage, editing, or sharing, you'll need to download the files.
Will downloading videos delete them from my VIOFO dashcam?
No. Copying videos from the SD card or via WiFi app leaves the original files intact on the SD card. To free up space, you must manually delete unwanted clips via the dashcam's playback menu or format the SD card (which erases everything).
Loop recording will eventually overwrite old non-protected files when the card is full.
What video format does VIOFO dashcam use?
VIOFO dashcams record in MP4 format using H.264 or H.265/HEVC codec (depending on model and settings), which is compatible with all major video players (VLC, Windows Media Player, QuickTime) and editing software (Premiere Pro, Final Cut Pro, DaVinci Resolve, iMovie).
Resolution varies by model: 1080p, 1440p (2K), or 4K (2160p).
How much storage space do I need for VIOFO dashcam videos?
Storage requirements (approximate per hour of footage):
- 1080p (A129 Duo): ~6-8GB per hour
- 1440p (A119 V3): ~10-14GB per hour
- 4K (A229 Duo front): ~20-30GB per hour
SD card capacity examples:
-
32GB SD card holds approximately:
- 4-5 hours of 1080p footage
- 2-3 hours of 1440p footage
- 1-1.5 hours of 4K footage
-
64GB SD card holds approximately:
- 8-10 hours of 1080p footage
- 4-6 hours of 1440p footage
- 2-3 hours of 4K footage
-
128GB SD card holds approximately:
- 16-20 hours of 1080p footage
- 9-12 hours of 1440p footage
- 4-6 hours of 4K footage
Recommendation: 64GB is ideal for most users (provides several days of footage before loop recording overwrites). For 4K users or those who infrequently review footage, 128GB recommended.
Can I edit VIOFO dashcam videos before sharing?
Yes, VIOFO MP4 files are compatible with all major video editing software:
First, blur faces and license plates using BGBlur (essential step before any editing)
Then edit using:
- Basic editing: iMovie (Mac), Windows Video Editor, CapCut (mobile/desktop), DaVinci Resolve (free)
- Professional editing: Adobe Premiere Pro, Final Cut Pro, DaVinci Resolve Studio
Editing tips:
- Always work with copies, never edit the original evidence footage
- Blur BEFORE trimming/editing for best privacy protection
- Export in high quality to preserve clarity for insurance/legal use
- Keep original and edited versions clearly labeled
How do I know if my VIOFO model supports WiFi?
Check your model number:
- WiFi-enabled models: A119 V3, A119 Mini 2, A129 Duo, A129 Plus Duo, A229 Duo, A229 Plus Duo
- No WiFi: A119 (original), A119 V2, A118C
Physical indicators:
- Look for a WiFi button on the camera body (marked with WiFi symbol)
- Check for WiFi LED indicator light
- Review the quick start guide or box specifications
If your model has WiFi, it will be prominently advertised in the product specifications.
Can I download VIOFO videos while driving?
Not recommended for safety reasons. While the WiFi app technically allows downloads while driving, you should:
- ✅ Wait until parked to browse and download footage
- ✅ Focus on driving, not dashcam management
- ✅ Pull over safely if you need to access footage urgently (e.g., immediately after an incident)
The dashcam continues recording normally whether you're downloading via WiFi or not, so there's no urgency to download while in motion.
Conclusion: Download Safely, Share Responsibly
Downloading videos from your VIOFO dashcam is straightforward with the SD card, WiFi app, or USB methods outlined in this comprehensive guide. Choose the method that best fits your specific situation:
- SD card: Fastest for large transfers and bulk downloads (recommended for most users)
- VIOFO app: Most convenient for smartphone sharing and quick access
- USB cable: Good middle ground when available on your model
Most importantly: Before sharing any VIOFO dashcam footage publicly on YouTube, social media, or any platform, blur all faces and license plates using BGBlur.com to protect privacy, comply with GDPR/DPDP/CCPA regulations, and avoid legal liability.
Your VIOFO dashcam captures valuable evidence and memorable moments—download them safely and share them responsibly.
Blur VIOFO dashcam videos instantly on BGBlur.com →
Related Resources
- How to Download Garmin Dashcam Videos — Complete Garmin download guide
- How to Download Rexing Dashcam Videos — Rexing app and SD card methods
- How to Blur Faces and License Plates in Dashcam Videos — Privacy protection guide
- Top 10 Tools for Dashcam Content Creators — Essential dashcam tools
- State of Visual Privacy 2026 Whitepaper — GDPR, DPDP, and BIPA compliance guide
- Is It Illegal to Show License Plates on Social Media? — Legal considerations
Last updated: May 28, 2026